

🧭 Introduction
Let’s be honest: documents rule our work lives. From budget spreadsheets and HR reports to top-secret memos and meeting minutes, our digital paper trail never ends. But what happens to those files after they’re created? Are they secure? Are they still relevant? Or are they floating around in your cloud like digital zombies?
That’s where document lifecycle management struts in like a well-dressed compliance officer with a clipboard.
In the modern workplace — with remote teams, data breaches, and increasing compliance regulations — managing documents effectively isn’t just a best practice. It’s critical. You need to know where your data lives, who can access it, how long it’s needed, and when to let it ride off into the digital sunset (aka deletion). ✨
Enter: Microsoft Purview and Sensitivity Labels — Microsoft 365’s not-so-secret weapons for data governance superheroes. These tools bring order to document chaos by classifying, protecting, and managing data throughout its entire lifecycle — from creation to deletion.
Whether you’re a compliance lead, IT manager, or the poor soul responsible for cleaning up years of untagged files (we see you 👀), this guide will walk you through:
-
What document lifecycle management actually means (yes, it’s more than clicking ‘delete’).
-
How Microsoft Purview brings unified governance to the rescue.
-
Why Sensitivity Labels are like digital security badges.
-
How to automate, monitor, and avoid common pitfalls.
-
Real-world use cases and success stories that make this more than just theory.
So grab your favorite coffee mug, open up that cluttered document folder, and let’s get your file game tight.
1️⃣ What is Document Lifecycle Management?
Alright, let’s demystify the fancy phrase: Document Lifecycle Management (DLM).
Sounds corporate, right? Like it belongs in a boardroom PowerPoint next to a pie chart. But in reality, it’s just a structured way to manage the life of a document — from the moment it’s born (created), through its awkward teenage years (editing and sharing), to retirement (archival), and finally… its funeral (deletion).
Let’s break down the stages of the document lifecycle like you would a Netflix series:
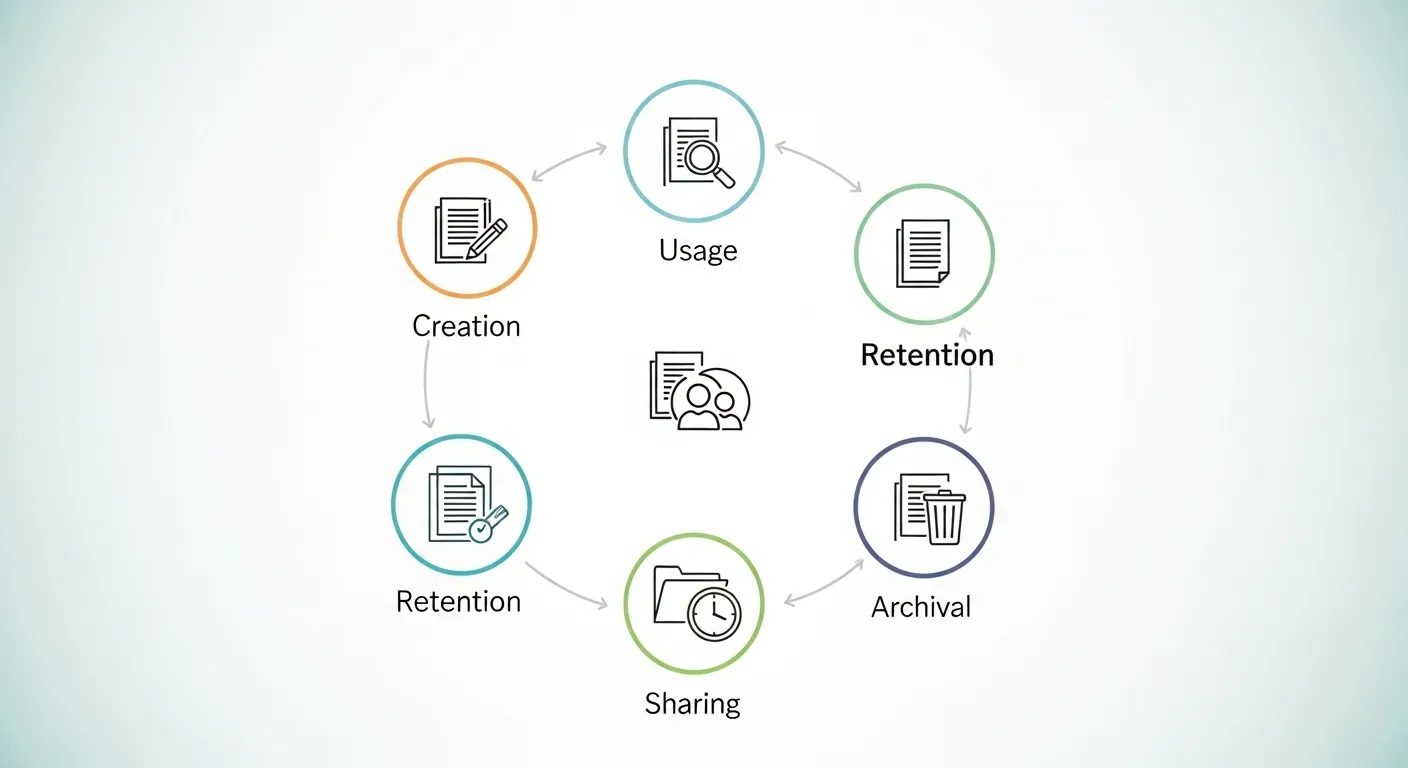
Document Life cycle Management
🎬 1. Creation
This is the pilot episode — the birth of your document. Think of your marketing plan, quarterly report, or employee contract getting its first draft in Word or Excel.
🔄 2. Active Use & Collaboration
Now the show’s in full swing. People are editing, commenting, emailing, sharing in Teams, uploading to SharePoint — basically, the doc is living its best life.
🧾 3. Retention
At this stage, the document’s value starts to change. It’s not “trending” anymore, but legally or operationally, you may need to keep it. Think: 7-year tax retention, client agreements, or audit logs.
🗃️ 4. Archival
Your document is now semi-retired. Not actively used, but still has to be accessible in case someone digs it up for compliance reasons (like those HR docs from 2018).
🗑️ 5. Disposal/Destruction
Finally, with legal and business boxes ticked, it’s time to say goodbye. This is a secure and compliant deletion — not just a trip to the Recycle Bin.
🏆 Why It Matters
Without proper document lifecycle management, you’re flying blind. You might:
-
Keep data longer than you legally should (hello, GDPR fines!).
-
Accidentally delete crucial files too early.
-
Let sensitive documents float around unsecured and unlabeled.
-
Waste storage on zombie files no one has touched in years.
With a structured lifecycle in place, you:
-
Reduce compliance risks 📉
-
Increase operational efficiency 🧠
-
Improve security 🔒
-
Make audits far less terrifying 🙏
It’s not just about control — it’s about smart governance in a data-heavy world.
2️⃣ Understanding Microsoft Purview
Let’s take a moment to appreciate Microsoft Purview — the Swiss Army knife of data governance. If you’ve ever wished for a tool that could magically classify, monitor, and protect your data across all of Microsoft 365 (and even beyond), this is it.
But what exactly is Microsoft Purview? And why is everyone from compliance officers to IT pros singing its praises louder than an Adele chorus?
🤖 What is Microsoft Purview?
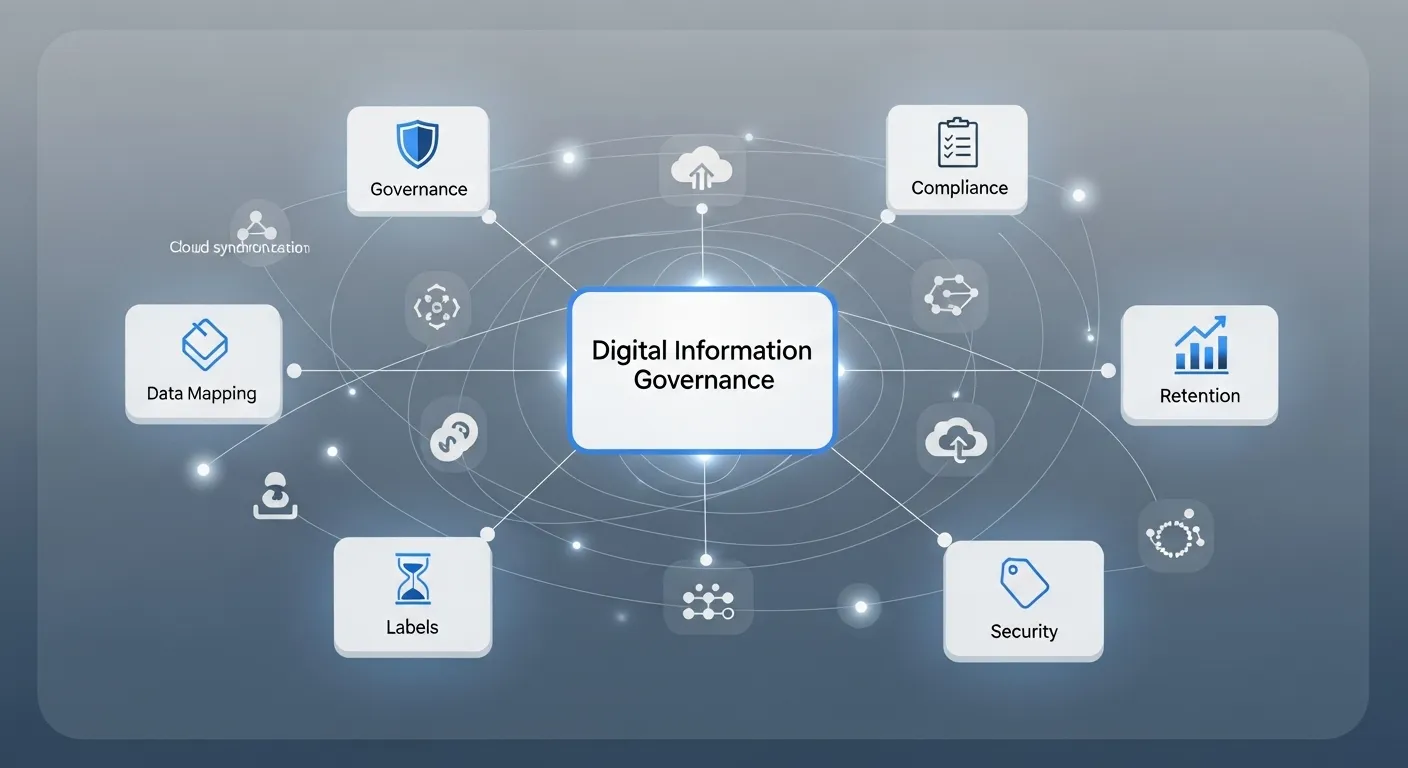
Microsoft Purview is your organization’s command center for unified data governance. It brings visibility, control, and automation to your document and data management — all from one sleek interface.
It’s like that friend who color-codes their calendar, meal preps every Sunday, and somehow always knows where their passport is. Microsoft Purview brings that level of organization to your information.
And it’s not just limited to Microsoft 365 — it works across your entire data estate, including Azure, on-premises, and multi-cloud environments like AWS and Google Cloud. Total governance domination.
🔑 Key Features of Microsoft Purview
Let’s break down the superstar tools under the Purview umbrella:
🧭 1. Unified Data Governance
This is the backbone. Microsoft Purview lets you create data maps, track where your information lives, and understand how it flows through systems. You get:
-
Automated data discovery
-
Classification by sensitivity
-
End-to-end visibility
It’s like a GPS for your documents and data.
🧑⚖️ 2. Compliance Manager
Audits coming up? Regulatory chaos knocking? Purview’s Compliance Manager gives you a dashboard full of risk scores, compliance posture, and suggested actions across frameworks like GDPR, HIPAA, ISO 27001, and more.
It’s basically your compliance cheat sheet.
🕵️ 3. Insider Risk Management
Not all data threats come from hackers in hoodies. Some are from Dave in accounting.
Purview’s Insider Risk Management flags risky behavior — like mass downloads, data exfiltration, or policy violations — before they become breaches.
🔐 4. Microsoft Information Protection (MIP)
This integrates directly with Sensitivity Labels to classify and protect documents based on their content. Think of it as a built-in security guard assigning access badges to every doc.
☁️ 5. Deep Integration with Microsoft 365 & Azure
No juggling apps here. Purview is natively integrated into Outlook, Word, Excel, Teams, SharePoint, OneDrive, Exchange, and even Power Platform.
So whether a document is being emailed, co-authored, shared, or archived — Purview is there, quietly working behind the scenes like an elite data ninja.
🎯 Why Microsoft Purview Rocks for Document Lifecycle Management
Here’s the kicker: everything you need for managing the entire document lifecycle — from creation to deletion — is already baked into Purview.
-
Create and apply Sensitivity and Retention Labels
-
Monitor document movement
-
Set automated lifecycle policies
-
Get compliance insights and alerts
No duct-taping third-party tools together. Just one platform to rule them all. 🧙♂️
3️⃣ Introduction to Sensitivity Labels
Let’s talk about the real unsung heroes of the Microsoft 365 world — Sensitivity Labels. These little metadata warriors don’t wear capes, but they do protect your most sensitive information like it’s the crown jewels of your organization.
In fact, if documents were like celebrities, Sensitivity Labels would be the bodyguards, security systems, NDAs, and dark sunglasses — all rolled into one.
🤔 What Are Sensitivity Labels?
In short: Sensitivity Labels are classifications you apply to emails, documents, and other content to protect and govern them based on sensitivity.
They work with Microsoft Information Protection (MIP) to control:
-
Who can access the content
-
What they can do with it (edit, forward, print, copy)
-
How it’s encrypted or watermarked
-
Where it can be stored or shared
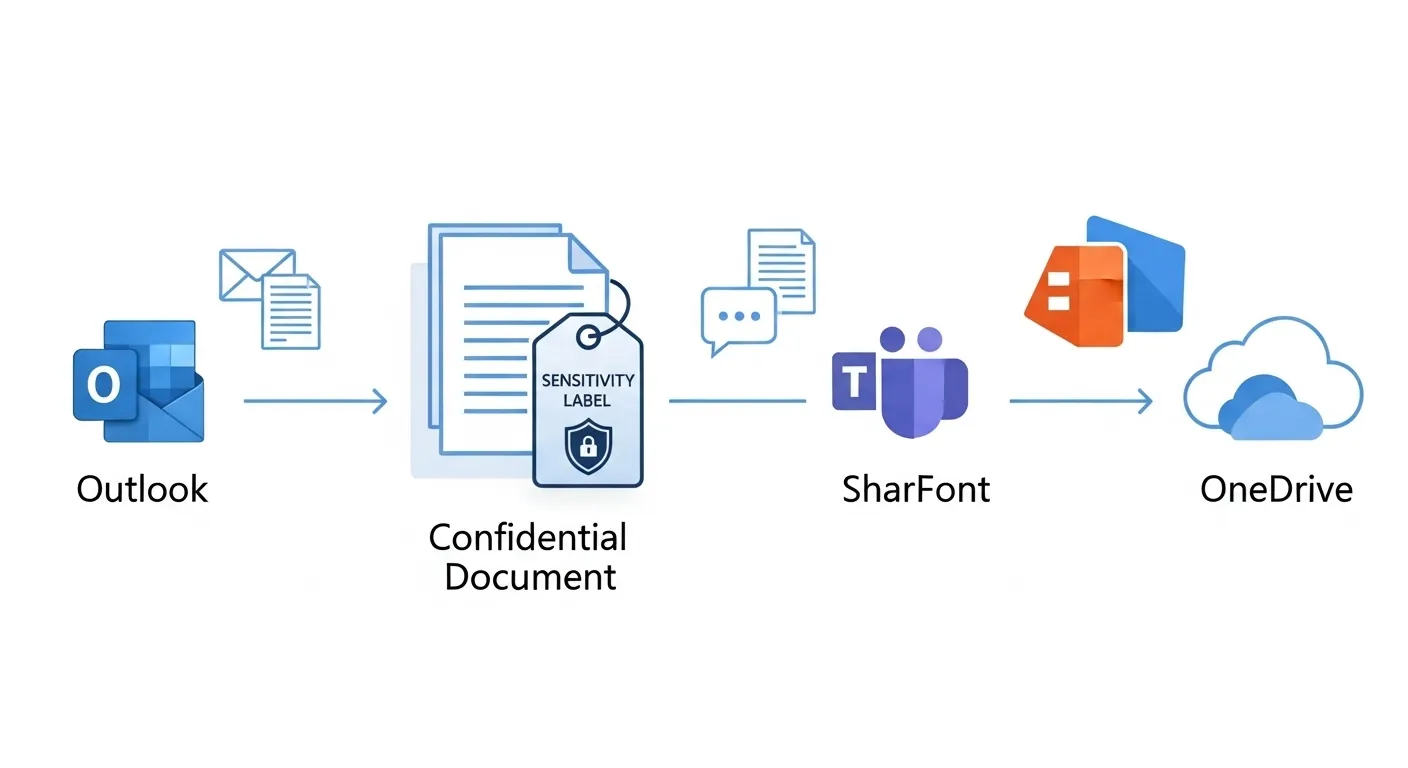
Think of them as digital “handle with care” stickers — except instead of peeling off after a week, they stick with the content forever. Even if the file is downloaded and emailed outside your org, the label — and its protection — stays intact. 🔒
🧠 Why Use Sensitivity Labels?
Because relying on human memory to secure content is… let’s be honest, risky at best. We’ve all hit “Reply All” when we shouldn’t have. 🫣
With Sensitivity Labels:
-
You classify data by content, not by location or who created it.
-
You automate protection based on rules and policies.
-
You reduce the risk of data loss, leaks, and compliance violations.
-
You gain peace of mind that your info is protected, even if it travels far from home.
📦 Where Can You Apply Them?
Everywhere. Seriously.
Here’s where Sensitivity Labels can work their magic:
| Platform | What It Labels |
|---|---|
| 📧 Outlook | Emails, attachments |
| 📄 Word, Excel, PowerPoint | Documents, spreadsheets, presentations |
| 💬 Microsoft Teams | Team chats, channels, shared files |
| 🌐 SharePoint & OneDrive | Stored documents |
| 📁 Power BI | Reports and datasets |
Whether your content lives in a document, a chat, or a cloud drive — labels are watching over it like the digital guardians they are.
🏷️ Common Sensitivity Label Examples
Here’s what a typical label structure might look like:
-
Public – For information that’s totally fine to share. Your “no big deal” stuff.
-
Internal – Only for employees, like policies or lunch schedules (yes, those matter).
-
Confidential – Restricted access. Maybe client proposals or performance reviews.
-
Highly Confidential – Top secret data: legal docs, IP, financial reports, the CEO’s evil plans (just kidding… maybe).
You can customize labels to fit your industry — whether you’re in finance, healthcare, legal, or even a secret superhero society.
🎛️ What Makes Labels Powerful?
-
They’re customizable: Set rules, icons, encryption, even color-coding.
-
They’re persistent: Labels travel with the document. Period.
-
They’re enforceable: You can restrict sharing, enable encryption, block external access — all with one label.
So, in essence: Sensitivity Labels help your team do the right thing — even when they’re busy, distracted, or just having “a Monday.”
4️⃣ Setting Up Microsoft Purview and Sensitivity Labels
Alright, you’ve seen the magic of Microsoft Purview and Sensitivity Labels. Now it’s time to set the stage and get this thing rolling. Yes, there are a few hoops to jump through, but don’t worry — I’m here to guide you like a smart GPS that also tells jokes.
Let’s build your labeling empire, step by step.
🔑 Prerequisites: Are You Label-Ready?
Before diving into the setup, make sure your Microsoft 365 environment is ready. Here’s your short pre-flight checklist:
✅ Licensing
You’ll need one of the following licenses (or higher):
-
Microsoft 365 E5
-
Microsoft 365 E3 (with Compliance add-on)
-
Microsoft 365 Business Premium
-
Or standalone Microsoft Purview solutions
Without the right license, Purview features might wave at you from behind a paywall.
✅ Admin Access
You must be a Compliance Administrator or Security Administrator in the Microsoft 365 admin center. No admin rights, no label party.
🛠️ Step 1: Access the Microsoft Purview Compliance Portal
-
Go to compliance.microsoft.com
-
Welcome to the Microsoft Purview Compliance Portal — the control room for all governance goodies.
-
From the left pane, navigate to Information Protection > Labels.
🏷️ Step 2: Create Sensitivity Labels
Now, let’s make your first label. Think of this as naming your children… but with encryption.
-
Click “Create a label”
-
Name it (e.g., “Confidential – Finance Only”)
-
Add a description to help users choose the right label (“Use for quarterly reports, budgets, and financial planning documents”)
-
Configure protection settings:
-
Encryption: Choose whether to restrict access and define permissions (e.g., Only people in the Finance department can open this file).
-
Content marking: Add a watermark, header, or footer.
-
Access control: Block external sharing? Disable forwarding? You decide.
-
Pro Tip: Make labels specific but not overwhelming. Too many options? People will either ignore them or apply “Highly Confidential” to the office party flyer.
📦 Step 3: Publish Labels via Label Policies
You’ve made the labels — now get them in front of your team.
-
Head to Label Policies in the same portal.
-
Click “Publish labels” and select the ones you just created.
-
Define:
-
Who gets these labels (users, groups)
-
Where they apply (emails, documents, Teams chats, etc.)
-
Default label settings (Optional but handy — you can set a default label to auto-apply for everyone.)
-
Mandatory labeling? If you’re feeling strict, make label selection mandatory before a doc is saved or email is sent.
-
Hit Publish, and BOOM — the labels start appearing across Microsoft 365 apps within a few hours (or up to 24 depending on the cloud gods).
🔄 Optional: Turn On Auto-Labeling (If You’re Feeling Fancy)
Auto-labeling = less human error. You can configure rules or use trainable classifiers to apply labels based on content patterns — like detecting credit card numbers, SSNs, or terms like “Confidential Proposal.”
More on that in the next section!

🎉 Recap
You’ve just:
-
Set up your labeling architecture
-
Built labels with protection settings
-
Published them via policies
-
Taken one giant leap for data governance
Not bad for one afternoon, eh?
5️⃣ Automating the Document Lifecycle with Labels
Alright, you’ve built the labels, published the policies, and now you’re sitting back sipping coffee like a labeling champion. But wait — what if you didn’t have to do it all manually?
What if those Sensitivity Labels just… magically applied themselves? 🪄
Welcome to the beautiful world of automation in document lifecycle management. It’s not just convenient — it’s essential for consistency, compliance, and keeping your coworkers from treating every doc like it’s “Public.”
🧠 Auto-Labeling: Because People Are Busy (and Forgetful)
With Microsoft Purview document lifecycle management, you can configure auto-labeling rules that scan content for patterns and automatically apply the right Sensitivity Label — without user interaction.
For example:
-
If a document contains a credit card number, it gets labeled “Confidential – Financial”.
-
If an email mentions HIPAA and includes patient data, it’s auto-tagged “Highly Confidential – Health”.
All of this happens behind the scenes, faster than you can say “data classification.”
🤖 How Does Auto-Labeling Work?
You have two main ways to auto-label content:
1. Content-based Conditions
These are built-in policies that detect:
-
Credit card numbers, SSNs, banking details
-
Keywords like “confidential”, “internal use only”, etc.
-
Regex patterns for specific data types
You can set these up in Microsoft Purview > Information Protection > Auto-labeling.
2. Trainable Classifiers
These are the AI-powered brains of Purview. You feed them sample documents — like contracts, resumes, or NDAs — and they learn to recognize content with similar patterns. 🧠
Example: Train a classifier on 50+ legal contracts, and soon it will recognize any doc that “feels” legally similar and apply your “Legal – Confidential” label.
It’s like teaching your dog to fetch — but instead of a stick, it retrieves compliance peace of mind. 🐾
🔐 Microsoft Information Protection (MIP) Does the Heavy Lifting
MIP is the engine that powers both sensitivity and auto-labeling. It:
-
Scans files and emails across Microsoft 365
-
Matches content against your rules or classifiers
-
Applies the correct label instantly
-
Keeps a log for auditing and reporting
And yes, it respects user permissions — so Dave in HR isn’t labeling the CEO’s legal files (unless Dave is the CEO — in which case, hi Dave 👋).
💼 Real-Life Scenarios
Let’s make this real with a few scenarios:
📄 Contract Management:
Auto-label any document containing phrases like “binding agreement” and monetary values as “Confidential – Legal.”
🧍♀️ HR Onboarding Docs:
If a doc includes employee ID numbers and personal info, it’s labeled “Highly Confidential – HR.”
📊 Financial Reports:
If Excel files contain quarterly revenue, they get tagged “Confidential – Finance Only” automatically.
💌 Emails with Client Info:
Emails mentioning client names + project codes = auto-labeled “Client Confidential.”
💡 Why It Matters
-
Reduces user error
-
Scales effortlessly across thousands of documents
-
Ensures consistent governance
-
Keeps your auditors smiling
Automation isn’t just a luxury anymore. It’s the difference between hoping your documents are protected… and knowing they are.
6️⃣ Retention and Deletion Policies
Okay, here comes the awkward conversation — it’s time to talk about saying goodbye.
Not to us, obviously. I’m talking about documents that have overstayed their welcome, like that ancient Excel file titled “FINAL_v9_REALFINAL_USETHISONE.xlsx.”
If you’ve ever wondered:
-
“How long do we really need to keep this file?”
-
“Can I delete this safely without angering Legal?”
-
“Wait… why do we still have sales data from 2012?”
Then friend, you’re ready to embrace Retention and Deletion Policies — a crucial chapter in Microsoft Purview document lifecycle management.
🧩 Retention Labels vs. Sensitivity Labels: What’s the Diff?
Let’s clear this up once and for all:
| Feature | Sensitivity Label | Retention Label |
|---|---|---|
| 🔒 Purpose | Protect content | Keep/delete content |
| 📌 Stays With File | Yes | Yes |
| 📦 Applies To | Emails, docs, Teams, etc. | Same |
| 🛡️ Controls Access | Yes | No |
| ⏳ Controls Duration | No | Yes |
So, while Sensitivity Labels manage access and protection, Retention Labels are the timekeepers and cleaners of your document lifecycle. They decide:
-
How long something stays
-
When it should go
-
What happens when time’s up (archive, delete, trigger event)
🛠️ How to Create a Retention Label in Microsoft Purview
-
Go to the Microsoft Purview Compliance Portal
-
Navigate to Information Governance > Labels
-
Click “Create a label”, but this time under Retention instead of Sensitivity
-
Name the label (e.g., “Retain 7 Years – Financial”)
-
Define your rules:
-
How long to retain (e.g., 7 years)
-
When to start (creation date, last modified, or a custom event like employee termination)
-
What to do after (delete, review, do nothing)
-
Then, just like with Sensitivity Labels, you’ll publish them via a Label Policy to the right users or locations.
🧠 Lifecycle Policies in Action
Let’s say you’re managing HR documents. You could:
-
Retain employee files for 7 years post-departure (compliance with labor laws)
-
Delete old resumes after 1 year (reduces liability under privacy laws)
-
Archive terminated employee’s mailbox for legal review
You can even automate retention based on events — like the last login date, termination, contract end date, etc. Pretty slick, right?
⚖️ Compliance Use Cases
Here’s where Retention Labels become lifesavers:
-
GDPR: Keep personal data only as long as necessary. Automatically delete it when it’s no longer needed.
-
HIPAA: Retain healthcare records for the mandated 6 years — no more, no less.
-
SOX (Sarbanes-Oxley): Store financial documents for 7 years.
-
Legal Hold: Prevent deletion of documents under investigation — even if a user tries to empty the trash.
You can even apply retention and sensitivity labels together — so a doc is both protected and retained for the right amount of time.
🧽 Clean, Compliant, and Clutter-Free
Retention policies aren’t just for compliance. They’re for:
-
Reducing clutter
-
Saving storage
-
Lowering risk
-
Keeping IT sane
Letting go is hard — but letting go automatically, legally, and smartly? Now that’s how modern document governance is done.
7️⃣ Monitoring and Reporting Document Activity

Okay, so now your documents are labeled, protected, retained, and even set to gracefully vanish when their time comes. But here’s the million-dollar question:
How do you know it’s all actually working?
You can’t just cross your fingers and hope for the best — not when compliance teams, security auditors, and your own curiosity want proof.
That’s where the real-time magic of monitoring and reporting in Microsoft Purview comes in. Let’s put on our inspector hats and dive into the dashboards, logs, and alerts that help you keep your doc lifecycle under control (and your reputation intact). 🕵️♂️📊
🧾 The Microsoft Purview Audit: Your Digital Paper Trail
Want to see who accessed what, when, and how? Purview’s Audit feature has your back.
You can track events like:
-
When a document or email was labeled
-
When a user tried to override or remove a label
-
When content was shared externally
-
When a retention policy deleted a file
-
Who accessed a sensitive document (or tried to)
You can search the Audit logs by user, activity, date, or file — giving you full visibility into your data’s journey.
Pro tip: You can retain audit logs for up to 10 years with Microsoft Purview premium licenses. That’s a lot of receipts. 🧾
📈 Label Activity Insights
If you’ve ever wondered:
-
Which labels are most used?
-
Where is sensitive data concentrated?
-
Are employees labeling content correctly?
…you’ll love Label Activity Explorer and Content Explorer.
These dashboards show:
-
Top applied sensitivity and retention labels
-
Locations of labeled content (SharePoint, OneDrive, Teams, etc.)
-
How users interact with protected data
Visual charts and drill-downs make it easy to spot trends, fix mislabeling, and focus training where it’s needed most.
🚨 DLP Alerts: Catch the Leaks Before They Happen
Integrated with Microsoft’s Data Loss Prevention (DLP) tools, Sensitivity Labels can trigger real-time alerts when risky actions occur, like:
-
Sending a “Highly Confidential” doc outside the organization
-
Uploading sensitive data to unapproved apps or cloud services
-
Mass downloading sensitive files
These alerts appear in the Microsoft Purview DLP dashboard and can also trigger emails, policy tips, or even block the action altogether.
Think of it as your data’s bodyguard saying, “Excuse me, you’re not on the list.” 🚫
🧑💻 Admin Dashboards: The 10,000-Foot View
Microsoft Purview’s Compliance Center gives administrators the bird’s-eye view they crave:
-
Label deployment success/failure
-
Policy health and configuration gaps
-
Recommendations for improving compliance posture
You can even integrate these insights with Power BI for custom reporting and executive dashboards.
🔍 Bottom Line
You can’t manage what you don’t measure. With Microsoft Purview’s monitoring and reporting tools, you’re not just throwing labels into the wind — you’re watching them work, evolve, and protect your org 24/7.
8️⃣ Best Practices for Effective Lifecycle Management
So, you’ve got Microsoft Purview humming, Sensitivity Labels deployed, Retention Policies cooking, and dashboards lighting up like a Christmas tree. 🎄 Bravo!
But… now what?
If you stop here, things will eventually fall apart. Trust me — a great lifecycle setup without smart ongoing practices is like owning a gym membership and only going once (in January). 💪😅
Here are the best practices to make sure your Microsoft Purview document lifecycle management strategy actually works — long term, in the real world, with real people (and their real bad habits).
🗂️ 1. Structure Your Labeling Taxonomy Like a Pro
A messy label system is the fastest way to lose employee buy-in. Keep your taxonomy:
-
Simple – Don’t overwhelm users with 15 similar-sounding options. “Confidential – Client” and “Confidential – Partner” might as well be a riddle if no one knows when to use which.
-
Consistent – Use a naming pattern like:
-
Public
-
Internal
-
Confidential
-
Highly Confidential
Add department-specific variants only if necessary.
-
-
Meaningful – Make sure label names and descriptions clearly explain why and when to use them. If users have to guess, they won’t guess right.
🔁 2. Review and Refresh Policies Regularly
Technology changes. Regulations change. So should your labels and policies.
✅ Review your labels and policies at least once a quarter
✅ Update descriptions, scope, and automation rules based on feedback
✅ Retire old labels to reduce clutter
✅ Add new labels only if there’s a solid use case (and owner)
Pro Tip: Use reporting data from Content Explorer and audit logs to drive your updates — not just gut feeling.
🧑🏫 3. Train Your People (Yes, All of Them)
Let’s face it: the best lifecycle system in the world falls apart if Dave from Finance still thinks “Confidential” means “post-it on the monitor.”
-
Run short, engaging trainings (bonus points for memes and GIFs 🙌)
-
Use real-world examples from your organization
-
Provide cheat sheets or tooltips in SharePoint/Teams
-
Use policy tips in Microsoft 365 to nudge users during work (e.g., “This file contains sensitive info. Consider applying a label.”)
🤝 4. Collaborate Across Teams
Document lifecycle management isn’t just IT’s job. It’s a cross-functional mission:
| Team | What They Bring |
|---|---|
| ✅ IT | Tools, configuration, automation |
| ✅ Compliance/Legal | Policy requirements, regulatory expertise |
| ✅ Business Units | Real-world document usage scenarios |
| ✅ Security | Risk awareness and response plans |
Build a governance board or task force if you’re in a larger org. If you’re a small business — just make sure someone from each team has a seat at the table.
🧠 Final Thought
Lifecycle management isn’t just about tools — it’s about people, process, and purpose.
Get those right, and Microsoft Purview becomes your secret sauce for secure, efficient, and compliant data handling.
9️⃣ Common Pitfalls and How to Avoid Them
Alright, legend — you’re nearly at the summit of the Microsoft Purview document lifecycle management mountain. 🏔️
But before you plant your flag and scream “Victory!”, let’s pause and look at some classic missteps that could sabotage your hard work faster than an unsaved Excel crash. 😬
Let’s walk through the most common traps — and how to ninja-roll your way around them.
⚠️ 1. Over-Labeling Everything Like a Paranoid Spy
You know what’s not helpful? When every single document gets labeled “Highly Confidential – Top Secret – Eyes Only.” Including the office coffee rota.
Over-labeling creates confusion, desensitizes users, and leads to:
-
Label fatigue (users just click anything to get it over with)
-
Access restrictions that slow down work
-
Unnecessary encryption and data storage bloat
✅ Fix it: Build a clear, lean label taxonomy. Use auto-labeling and policy tips to guide, not overwhelm.
🚫 2. Under-Labeling (a.k.a. “Meh, I’ll do it later”)
On the flip side, many users just skip labeling altogether — especially if it’s optional. Unlabeled data = unprotected data = a field day for compliance issues and data leaks.
✅ Fix it:
-
Use mandatory labeling on sensitive content types.
-
Combine manual + auto-labeling for coverage.
-
Train users with bite-sized demos and practical examples.
⚙️ 3. Misconfigured Retention Policies
“Oh no, we accidentally deleted last year’s financial records!”
Yes, this happens — especially when retention labels are applied broadly without clear review, or not tested properly before rollout.
✅ Fix it:
-
Always test policies in a small pilot group first.
-
Use default retention policies only with clear use cases.
-
Review retention logs and simulate policies before enforcing.
🙃 4. Forgetting the Human Factor
Let’s be real: tools don’t fail — people do.
Resistance, confusion, apathy — all come into play if you don’t manage the change experience.
✅ Fix it:
-
Involve end users in label design.
-
Collect feedback often (“Is this label structure working for you?”)
-
Celebrate wins — like “We prevented 27 data leaks this quarter!” 🎉
🧠 Pro Tip: Document Everything
From label definitions to retention schedules — document your lifecycle policies. It helps with onboarding, compliance audits, and “Why did we set that to 3 years again?” moments.
🔟 Real-World Use Cases and Success Stories
Still wondering if all this Microsoft Purview and Sensitivity Labeling jazz actually works in the wild?
Let’s look at how real companies are using Microsoft Purview document lifecycle management to conquer chaos, tame compliance, and save their IT teams from early retirement. 😅
These aren’t sci-fi fairy tales — these are real wins by real teams. Let’s dig in.
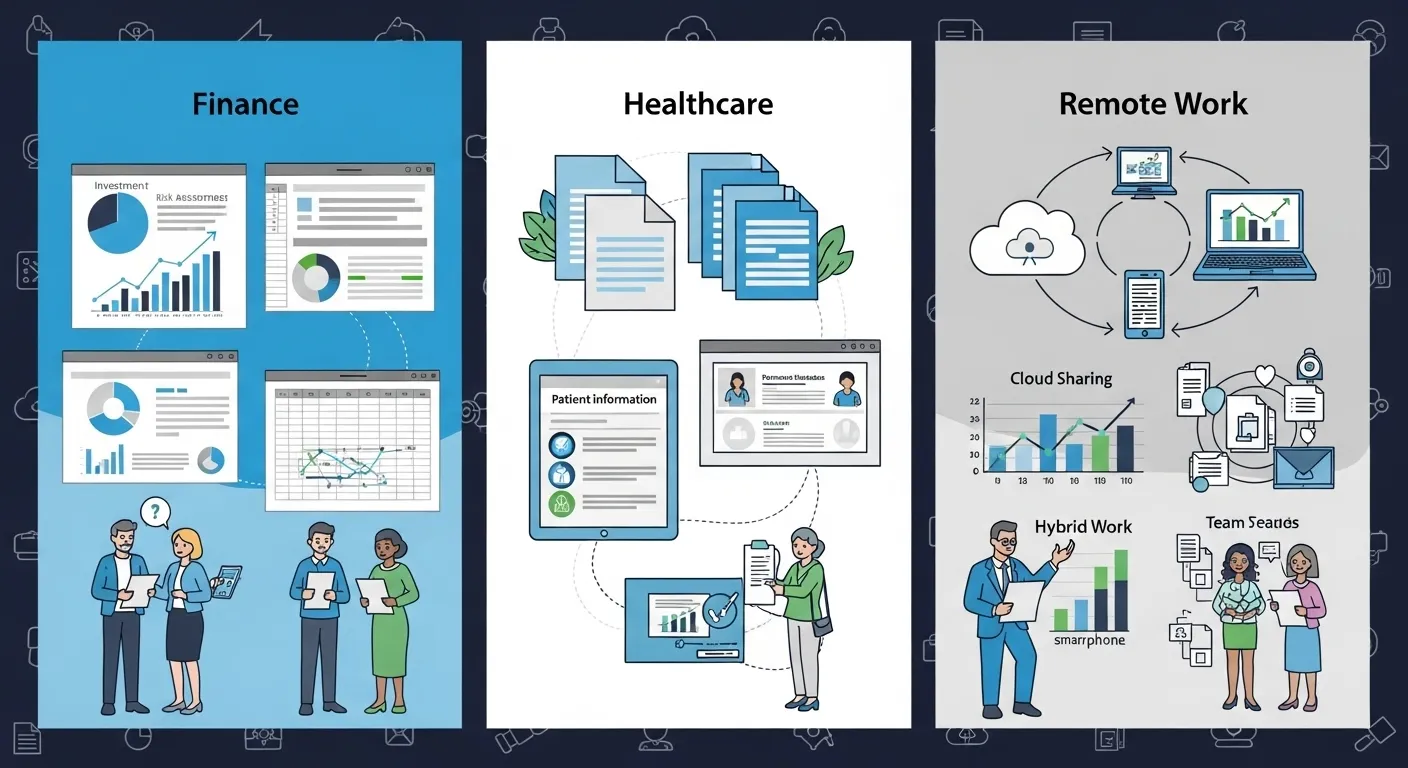
💰 Use Case 1: Finance Department – Bye-Bye Spreadsheets from 2009
The Problem:
A global financial services company had thousands of Excel sheets floating around. Some were confidential budget forecasts, others were pizza party sign-up sheets — but no one knew which was which.
The Fix:
-
Implemented Sensitivity Labels like “Confidential – Internal” and “Highly Confidential – Financial.”
-
Used trainable classifiers to auto-label spreadsheets containing financial terms.
-
Set up 7-year retention policies for reports and 90-day deletion for drafts.
The Win:
✔️ Reduced risk of leaking investor data
✔️ Cleared up 1.2 TB of storage
✔️ Passed a surprise audit with zero findings 🙌
🏥 Use Case 2: Healthcare Compliance – HIPAA Just Got Easier
The Problem:
A hospital network struggled with unstructured patient data in Teams and SharePoint. Nurses would collaborate, but sensitive info got shared too broadly.
The Fix:
-
Created Sensitivity Labels like “PHI – Internal Use Only”
-
Applied DLP policies to block unauthorized sharing of labeled content
-
Set retention policies to delete records after the HIPAA-required 6 years
The Win:
✔️ Full HIPAA compliance
✔️ Reduction in accidental data leaks
✔️ Boosted patient trust (and Board confidence)
🏡 Use Case 3: Remote Work – Managing Data in the Cloud Era
The Problem:
A marketing agency went remote in 2020 and never looked back. But so did their documents — across laptops, home networks, USB drives (yikes), and unapproved apps.
The Fix:
-
Used auto-labeling based on document content
-
Applied device and location restrictions for sensitive files
-
Rolled out label activity dashboards to monitor risky user behavior
The Win:
✔️ 65% drop in data exfiltration attempts
✔️ Peace of mind for the remote security team
✔️ Enabled secure hybrid work without slowing down creativity
🌟 The Common Thread?
All of these wins were powered by one thing: intentional, automated document lifecycle management using Microsoft Purview and Sensitivity Labels.
When used right, they don’t just help you survive audits or “get compliant” — they let your teams work faster, safer, and smarter.
✅ Conclusion + Key Takeaways
And there it is, my data-driven friend — you’ve just conquered the complete world of Microsoft Purview document lifecycle management without falling asleep or rage-quitting. 🙌🎓
Let’s recap what we’ve unlocked on this gloriously nerdy journey:
-
📂 You now know what document lifecycle management is and why it’s the backbone of data governance.
-
🛡️ You’ve met the power duo: Microsoft Purview and Sensitivity Labels — and learned how they secure and streamline your document universe.
-
⚙️ You can confidently set up, automate, retain, delete, and monitor your files like a pro with a clipboard.
-
📊 You’ve got best practices to stay organized, and you know what not to do (looking at you, “FINAL_finalFINAL.docx”).
-
💡 Real companies — from finance to healthcare to hybrid teams — are already making this work.
So what’s next?
→ Don’t just close this tab and move on. Take action.
Here’s your friendly push:
-
Audit your current file and document landscape.
Is it labeled? Protected? Retained properly? -
Start small.
Roll out labels to one department or doc type, then scale. -
Involve your people.
Get feedback. Adjust. Make it make sense to real users.
Remember, managing your document lifecycle isn’t just about compliance. It’s about protecting your business, empowering your teams, and keeping your data exactly where it belongs.
And now? You’ve got the tools — and the swagger — to do just that. 😎💼
🔍 Bonus Section: FAQ
Because no matter how thorough we are (and let’s be honest, we nailed it), there are always those lingering questions that pop into your brain at 2 a.m. 🧠💭
Don’t worry — I’ve got you. Let’s tackle the most common “Wait, but what about…” questions in Microsoft Purview document lifecycle management.
❓Q1: What’s the difference between retention labels and sensitivity labels again?
Ah yes, the classic mix-up. Quick refresher:
-
Sensitivity Labels: Control who can access and what they can do with a file (e.g., encrypt, restrict sharing).
-
Retention Labels: Control how long to keep a file and what happens after (e.g., delete, archive).
Think of Sensitivity Labels as the bodyguards, and Retention Labels as the timekeepers with clipboards.
❓Q2: Can labels be applied automatically, or does someone have to do it manually every time?
Hallelujah — they can be automatic!
You can use:
-
Auto-labeling policies based on sensitive info types (e.g., credit card numbers, SSNs)
-
Trainable classifiers that learn from your sample files
-
Default labels for specific groups or locations
So yes — you can (and should) take human forgetfulness out of the equation. 🤖✨
❓Q3: How do labels affect collaboration in Teams or SharePoint? Will it block sharing?
Great question. Labels can limit sharing — but only if you configure them to do so.
You can allow collaboration within your org but block external sharing, or even limit forwarding and printing. And yes, labels travel with the file, even across SharePoint and Teams, so protection stays intact.
Best part? Users will see clear messages like “You don’t have permission” instead of vague errors.
❓Q4: Is Microsoft Purview only for enterprise-level plans? Can small businesses use it too?
Not at all! While the full suite (including auto-labeling, classifiers, and advanced auditing) is part of Microsoft 365 E5 and Business Premium, basic Sensitivity Labels and Retention features are available in Microsoft 365 Business Standard too.
Even small teams can benefit — you don’t need a skyscraper HQ to protect your docs.
Learn beautiful Animations in powerpoint – https://www.youtube.com/playlist?list=PLqx6PmnTc2qjX0JdZb1VTemUgelA4QPB3
Learn Excel Skills – https://www.youtube.com/playlist?list=PLqx6PmnTc2qhlSadfnpS65ZUqV8nueAHU
Learn Microsoft Word Skills – https://www.youtube.com/playlist?list=PLqx6PmnTc2qib1EkGMqFtVs5aV_gayTHN